Wednesday, January 31, 2018

Celebrate


After I got my new Color  Brusho from Stampin Up!, I didn’t get a chance to use it.  I had some Color Brusho before, but different colors with Stampin Up‘s.   I just bought some wide mask tape. So I decided to try those Brusho.

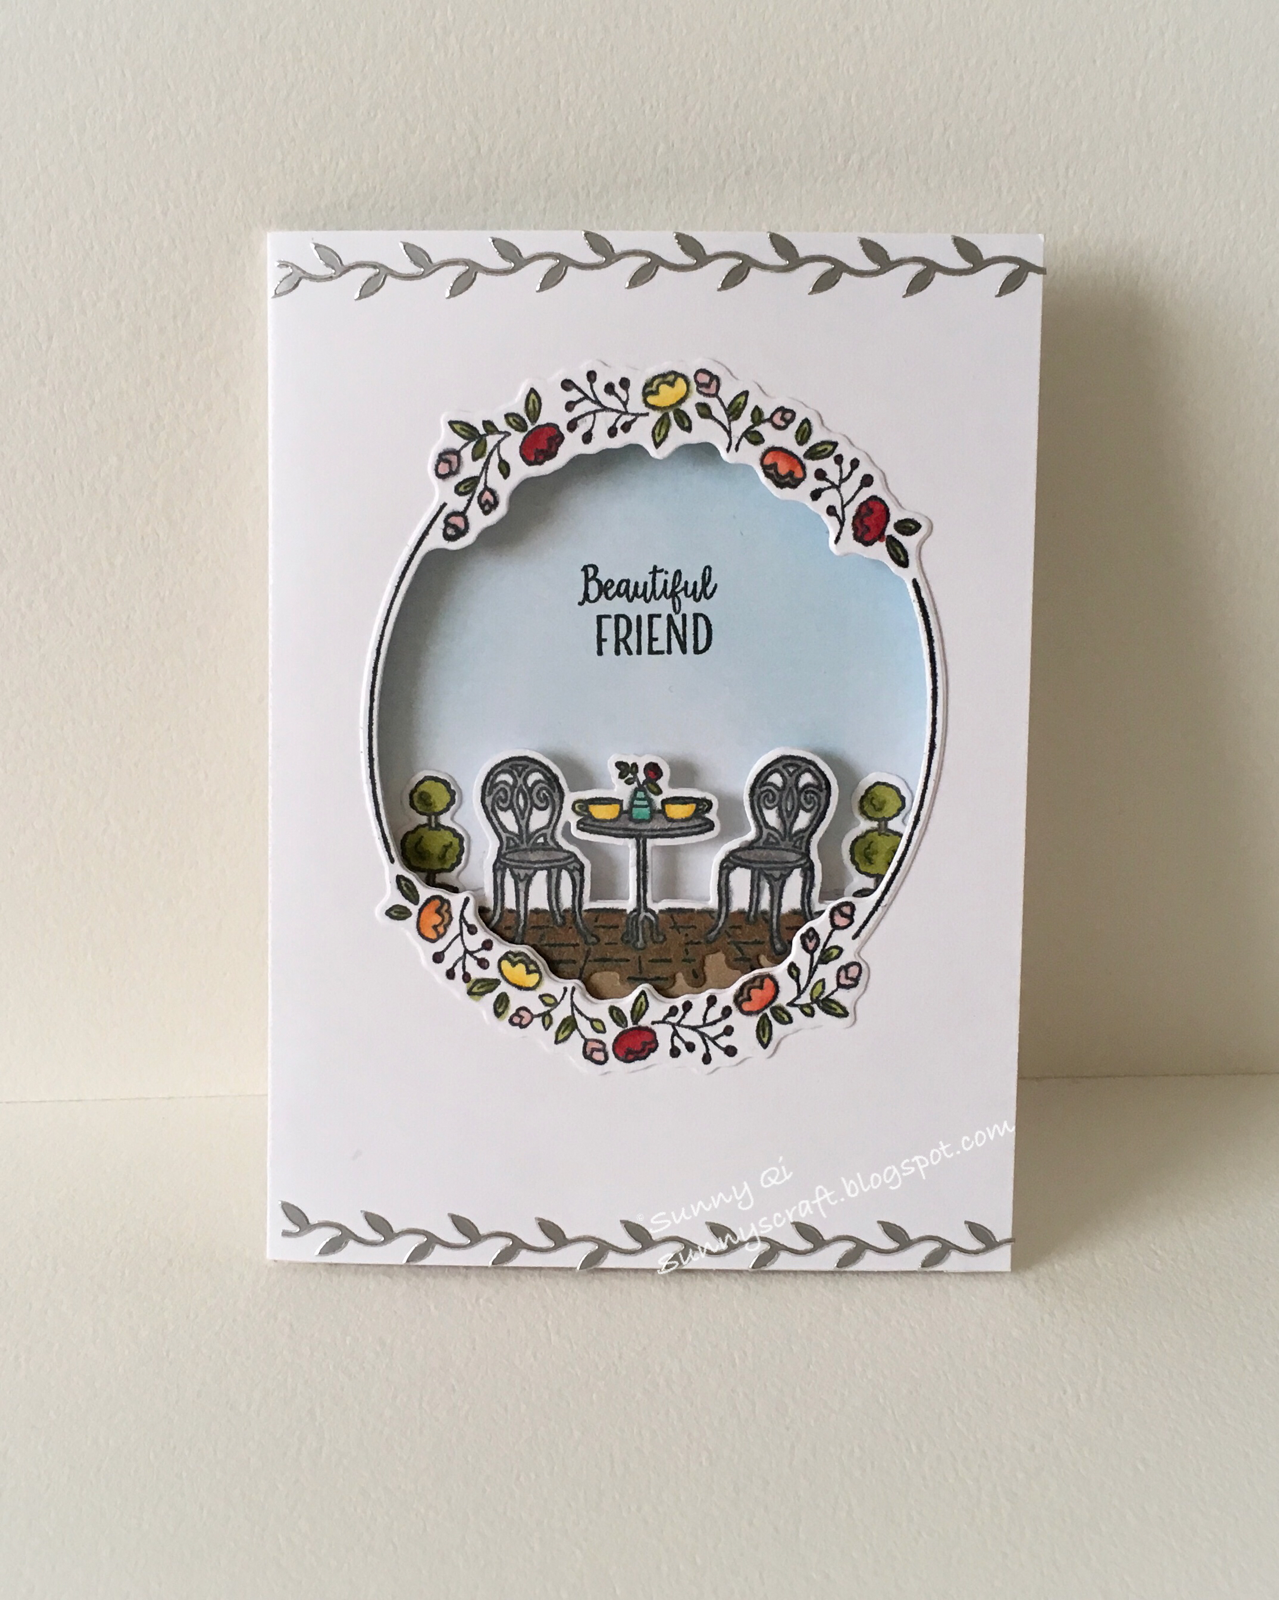
I used the mask tape to covered all four edges and lower place that I wanted to stamp sentiment. Then I stamped the flowers randomly on the card and embossed by white embossing powder.

I wet all card by water (I used the watercolor paper). I tapped the Color Brusho on the card. Different place with different colors. Then spayed water again. I used the paper towel to absorb extra water. And repeated all process again until I was satisfied the result.

After dry, I stamped the sentiment and cut off the white edges which covered by mask tape. I used the embossed cardstock under panel. And added some embellishment on the card too.

I chose the white cardbase.

Supplies that I used:

Monday, January 29, 2018

Life is beautiful


After cold winter, I felt the spring is close. Strong sunshine made all rooms were bright. I dreamed I meet friend, drink a cup of tea and seat out of cafeteria. Life is so beautiful. I made this card was from my dream.

I covered the awning by post note and all edges that I didn’t want to color area. Then I used background stencil and lightweight sponged the color to make this brick wall. I colored the awning by color pencils.

I stamped and colored the table and chairs on the other white cardstock. Then die cut it out. And installed cards by foam tape.

Supplies that I used:
Sentiment from my stash. That stamp bought from local store.

Saturday, January 27, 2018

Sushi thank you card made by Belle


Belle 's friends loved her handmade cards. Today she made this Sushi thank you card for her friend. They love to eat sushi and they only know couple Japnese words include this " arigato" that  means thank you. Very funny, she wanted to use this word here. 

She die cut the white panel and colored the sushi set on the other white card by acholol markers. Then cut it out. She likes the clean and neat style. 

She added the pattern paper under the white panel and some sequins (that from my stash). 

It's a very simple and clean card. I love it. 

Supplies that I used:


Thursday, January 25, 2018

Ready, set, SNOW!


Super cold day finally past from here. Outside is sunshine. But when I looked at winter stamp set. Those penguins are so adorable. I decided to make a  slide card today.

I sponged the sky and die cut the slide. I also sponged the same blue color on the other white card and added it on behind of slide.

I stamped three penguins and colored very light shadow by cool grey 2 and 1 color pencils. I did the same to the ice mountain. I added cool diamond glitter on ice mountain and ground.

Supplies that I used:

Tuesday, January 23, 2018

Magical Day-- sending wishes your way


Stampin up has very pretty and shimmer myths and magic designer series paper. It coordinates with stamp and dies bundle too.  There is beautiful shinny dragon.

Today I wanted a little change. I didn't use stamp and colored it. I fussy cut this beautiful dragon out from the designer series paper. I also cut out castle and trees. And I used foam to stick all pieces on the card.

For background, I sponged the cloud by the MFT cloud stencil.

Supplies that I used:

Monday, January 22, 2018

Thanks a ton!


Belle with me decided to make a shaking card for her friend who loved our handmade cards. It’s first time we make card together. Lovely!

I sponged the sea background and stamped tiny fish groups and sand at the bottom of sea. I also colored one whale and die cut the wonky frame.

Belle continued to add the acetate, sentiment  and sequins to build a shaking card. Then she colored a light whale and glue it on the outside of acetate. She also added some drops around the whale. She decided to add the second whale and cut its tail to make it swimming into the window area. I thought it was great idea.

Finally we added couple sequins on the outside frame to hide the ink smoosh.

Supplies that I used:


Saturday, January 20, 2018

Have an ice day!


My daughter and her friends love the cute animals cards. So I decided to make some for them.

I found one page sky night paper from my stash. I used it for today’s card background. I sponged night of navy color on the card which are blue area to make even more dark. And sponged yellow color on that stars.

I colored twos bears and die cut two pieces of snow bank. I also added some glue on the snow bank edge, then stuck some glitter on it to make snow.

Supplies that I used:

Thursday, January 18, 2018

Friends make the good time better


I thought I could try to watercolor the Waterfront stamp set to make a card. I knew this stamp set already shows the watercolor result.  But I wanted to make even more watercolor. No too bad to try.

I used the heavy weight watercolor paper. I stamped the land on the card and used brush to melt it. I was not worried about stamp clear or not because of the text of paper.

After dry, I started the palm trees and water. I just added water to my brush. If I liked deep color, I tapped less water. Otherwise I used the more and more water to make water getting lighter. Then I colored sun and sky.

Supplies that I used:

Tuesday, January 16, 2018

Hi! Hello! How are you?!


I couldn't wait to open my order from Ellen Hutson. I like their Jan. new release. But I was not fast enough to get the matching dies. It's not too bad because the whale is easy to cut out.

I chose the Bristol white paper to build the sea water. I tore the top of paper twice to make waves.

I colored whale and fussy cut out. And I stamped the sand on the bottom of card and group of tiny fish. I glued the whale position looked he said hello to tiny fishes.

Supplies that I used:

Monday, January 15, 2018

Happy Day


Here’s weather changed so quick like a roller coaster. Tomorrow will drop to 17F and no snow. Next week will be up to 60F. Outside is getting dark and dark. So I decided to make a happy day card.

I put the elegant eggplant ink pad on my craft sheet and sprayed some water. Tapped the card on it until I liked the result. I added a little bit night of navy.

After dry, I stamped images except flower on the card. Then I sponged this beautiful deep purple color on the card from edge to center.

Finally I stamped the flower on the center of card and used color pencils to color it. And added the sentiment.

Supplies that I used:

Saturday, January 13, 2018

Valentine cards series 1– two hearts cards made by small die kit of Spellbinders


After I received Spellbinders January kits, I decided to start creating valentine’s card. My daughter said nobody did valentine’s to give all class In the middle school last year. I thought ok, she grew up. So I donated most of my valentine’s card to children hospital. I will do it this year.

Spellbinders has wonderful dies. I thought their monthly kit it great and price is reasonable. Today’s I used the small kits that included six dies. Only $7.50 plus shipping. I will post link below.

I die cut lager heart wreath on gold shimmer card that bought from local store and white cardstock. I had the left center heart that I used it to make second card.  I also die cut other small flowers and arrow with heart. When I die cut those small pieces, I added the double side adhesive on the top of cardstock. After die cutting, I dipped them in different glitter to make colors. It’s fun process.

Finally I installed every piece on the two cardbase.

Supplies that I used:

Thursday, January 11, 2018

Thinking of you-- window card


I bought the winter woodland stamp set coming with UK magazine "crafts beautiful" from Barnes and Noble. I like those winter scene.
I used the house stamp to make today's card.

I used the Tombow water-base marker directly color on the stamp. I used the Misti, so I can stamp many times I need.

After this step, I used the brush to add tiny water on the image. And I added the blue to sky and green for land.

I die cut the window on the card. And used the foam tape to glue watercolor scene on the back. This is simple card.

Supplies that I used:

Wednesday, January 10, 2018

Amazing you -- Stencil background


I just like this stencil from Stampin Up new catalog. I decided to use this stencil to make a card today. No stamping at all.

I used the stencil to cover on the whisper white card stock. I sponged the elegant eggplant ink over it and spread the transsulent embossing paste to cover it again. When I sponged ink color, I used heavy hand on the top and light hand on the lower side.

I die cut amazing by silver glitter paper and you by elegant eggplant carstock. I glued sentiment and sequins, drops on the card panel. I also added the slim diagonal silver washi tape(included in Sweet Soirée Embellishment Kit) around the purple card panel.

Supplies that I used:

Monday, January 8, 2018

Tri-fold Card — Beautiful Friend


When I first saw this stamp and die bundle from Stampin Up Occasion Catalog, I decided to add them to my first order list. Today I tried to play them.  
I used the one piece 8.5x11 cardstock to cut 5" wide, and folded at 3.70". Then turned over the cardstock and folded at 3.70" again. And die cut two windows. It shows like below.

Then I stamped the flower circle on the other white cardstock. After coloring, I used the two dies in the set to cut flower circle out And glued on the front card. 


I stamped the table and chair set on the other white cardstock and colored them. Die cut out and glued on the right side card. 

On the center part, I sponged the sky and stuck the two flower pots on the card that shows through second layer. It looked like standing behind chairs. 


  Supplies that I used:

Friday, January 5, 2018

Love each other


Today is my husband's birthday. Yesterday I made a celebrate shaker card for him. Today I made this Love each other card to tell him that I love him.

I put all ink on the craft mat and sprayed some water. Then I put white cardstock to tap into it many times until the result I like. Left it over to dry.

I stamped branch and birds and  background stamp on the card. Then I sponged the card from edge to center. I also sponged the cardbase to match the front.

I used the Tim Holtz small talk stickers for the sentiment.

Supplies that I used:
Stampin Up World of Dream stamp set (retired).

Thursday, January 4, 2018

Happy birthday to my hubby


Tomorrow is my husband’s birthday. I made a birthday card for him today.

I used the new Stampin Up sale-a-bration die “celebrate” cut twice and glued them together. I also cut a frame by MFT die on year of cheer designer series paper to make a shaker card.

I used small punch to cut out some balloons, candles and cakes on different color of shimmer paper that I bought from local store. Small birthday punch from my stash.

It’s not a difficult shaker card. I just want to say celebrate birthday!

Supplies that I used:

Wednesday, January 3, 2018

Today is all about you


Holiday is over. Back to school, back to work. I sat down and start to think what I like to make today. I wanted something a little different.

After a while, I started my work. I chose the Lindy's gang magic powder for making peacock background. I chose to make the teal color by Tibetan poppy teal and Ponderosa pines olive.

After dry, I used the white embossing powder to emboss the peacock and tails. I chose a oval shape die to cut out peacock.

I picked the light pink cardbase. But I still feel too plain. Then I decided to stamp some images on it.

Sentiment I used the light blue embossing powder that is from my stash.

Supplies that I used:

You may also like:

Related Posts Plugin for WordPress, Blogger...